
First of all, this article is an approach on how to make a game look like Limbo, the game. I’m not saying that this is the way Limbo creators did it.
Below we have an example of a photo and a video that show how the shader looks.

Analyzing the appearance
Firstly, we have to figure out what makes Limbo’style stand out. Knowing these attributes will let us translate it into requirements, and finally implement it in our shader.
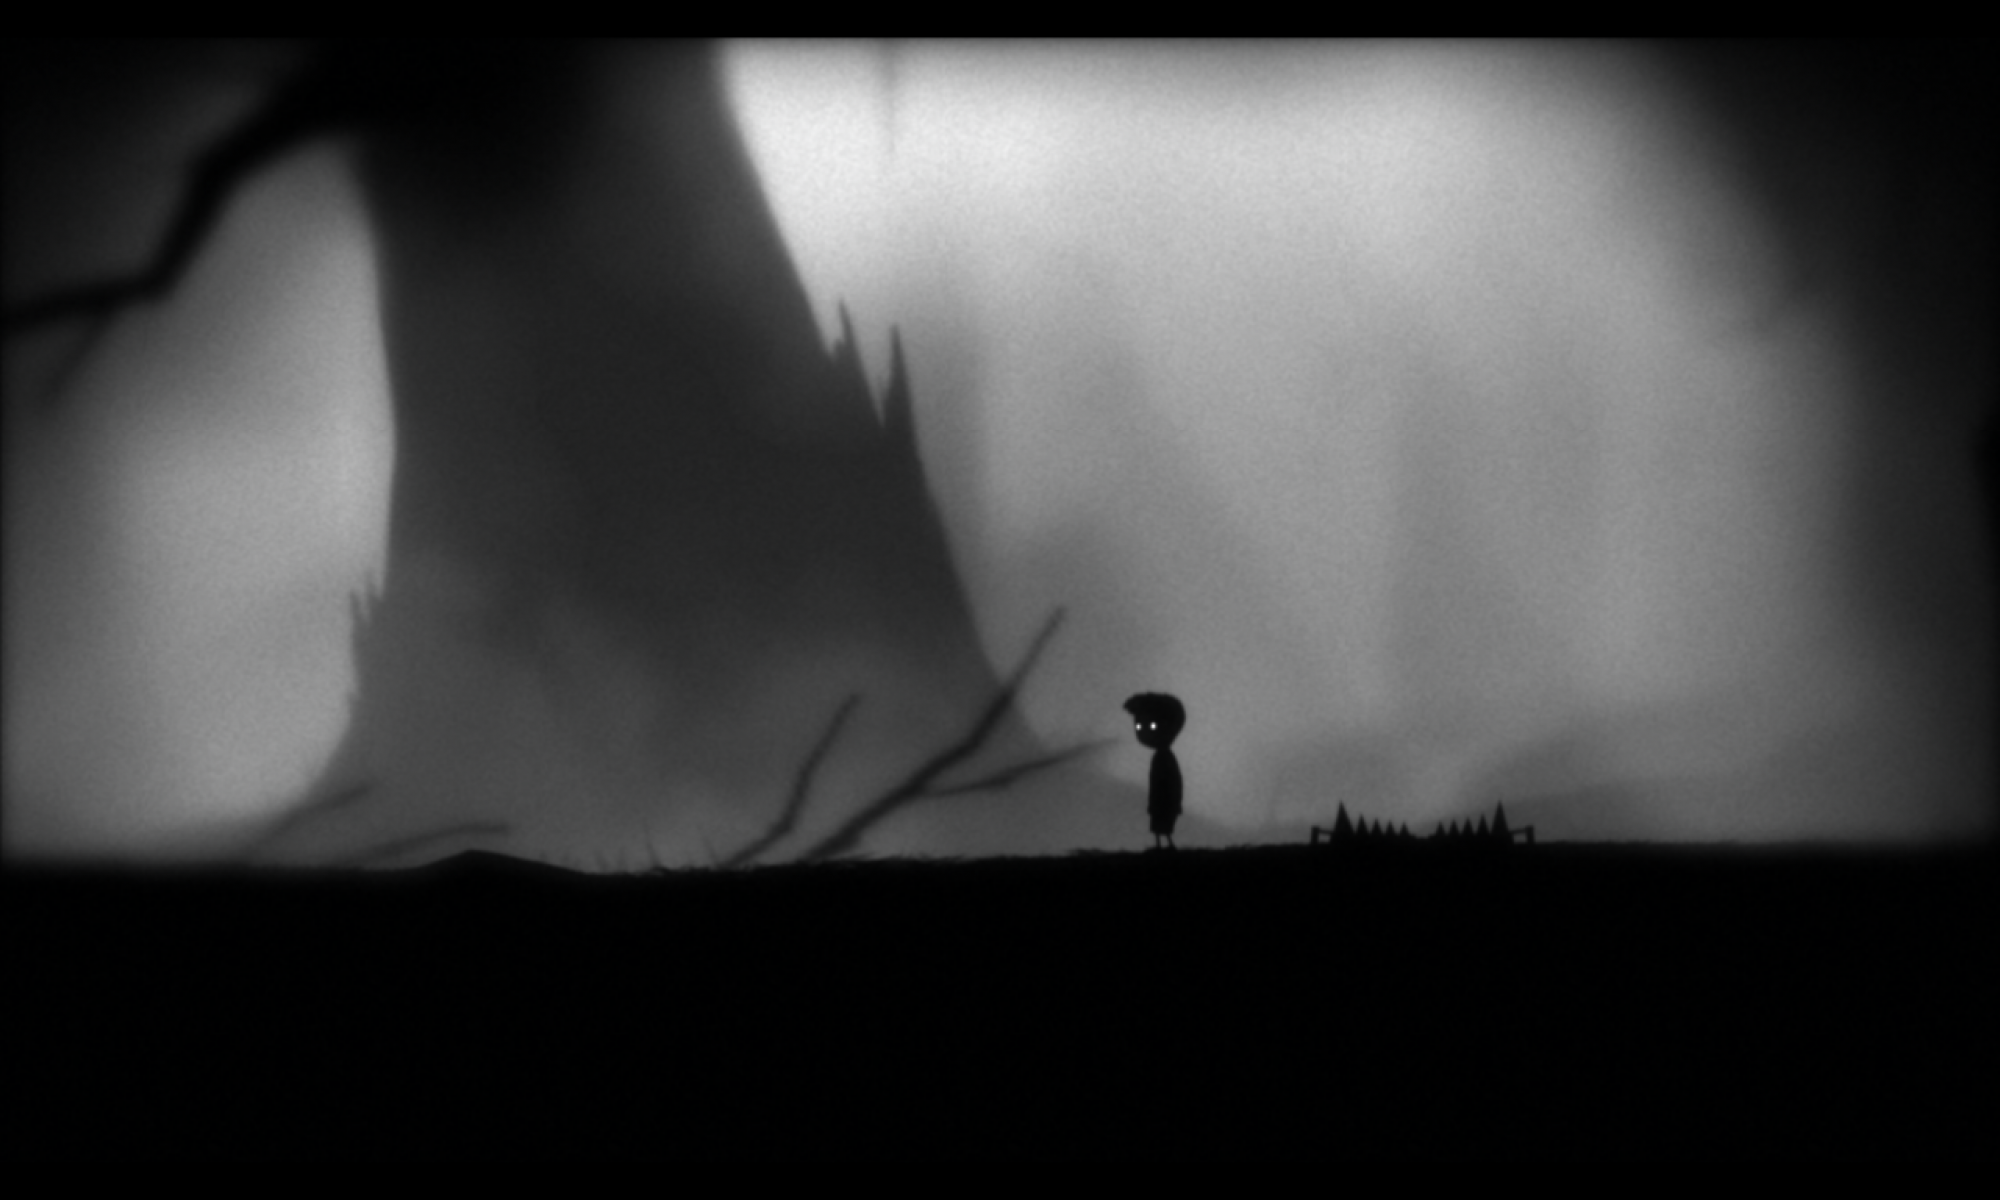
We can achieve the first step just looking at a screenshot of the game and describing it. Let’s practice, what attribute do you think makes the screenshot below special?

Tic tac! Time out! Well, I’m going to resume my answer into bullet points:
- All the picture is in Black & White.
- There’s some kind of vignetting.
- Blur near to the borders of the picture.
- Noise in the picture, like the noise generated by an old TV.
The work previously done is crucial and it will help us start building our shader.
To implement these requirements we’re going to use the game engine Unity 3D. In order to get your Unity scene ready to be able to implement an image processing effect, just go to this article.
You can find the complete shader at the bottom of this article. Anyway, I’m covering the fragment function (where is the limbo effect acting) step by step.
All the picture is in Black & White.
The first thing we do is turning our image into a gray value. That means, get the luminosity of the pixel.
fixed4 frag (v2f i) : SV_Target
{

   // sample the texture
   fixed4 col = tex2D(_MainTex, i.uv);
   //Apply the perception brightness proportion for each color chanel
   float luminosity = col.x * 0.3 + col.y * 0.59 + col.z *  0.11;
   return fixed4(luminosity,luminosity,luminosity,1.0);

}
The fragment shader is receiving the UVs coordinates of the _MainTex and the _MainTex, which is the rendered image. The UVs correspond to our screen coordinates being our left bottom screen the (0,0) and the upper right the (1,1).
We sample the texture and get the pixel we are currently processing by the GPU. Now, we extract the luminosity using the values:
Luminosity = channel red * 0.3f + channel green * 0.58 + channel blue * 0.11;
Finally, our frag function returns a fixed4, initialising each value with the luminosity get before.
So right now every pixel of our image in turned into a luminosity value.
If we implement this fragment function, we’ll get a black and white effect.
Noise on the picture, like the noise generated by an old TV.
Now we have our first requirement done, let’s do the second one! This step consists of adding an old Tv noise appearance.
To achieve this effect, we just choose a cool noise image from the internet. For example:

So we add a new property to our shader in order to be able to set this texture in the material which will wrap the shader:
Properties
	{
		_MainTex ("Texture", 2D) = "white" {}
		_OldTVNoise("Texture", 2D) = "white" {}
		_NoiseAttenuation("NoiseAttenuation", Range(0.0,1.0)) = 0.5
		_GrainScale("GrainScale", Range(0.0,10.0)) = 0.5

	}
You can appreciate that the are more properties than the _OldTVNoise texture. They are going to be used as configuration values for the noise.
A look on how to proceed in the fragment function. What we are doing is just getting a color value from the noise texture, using the UVs coordinates from the rendered image and multiplying this value by our image grayscale luminosity value.
But, what we get here? I mean, yeah we are multiplying both textures but how it actually works? Well, If our rendered image has, for example, a value of 0.5, which is a gray value, and we multiply it by the value of the noise texture, for example, another 0.5, we’ll get a result of 0.25. So we can appreciate that the rendered image will be affected by the noise texture, making it darker depending on the value of the noise texture.
fixed4 frag (v2f i) : SV_Target
{
      // sample the texture
       fixed4 col = tex2D(_MainTex, i.uv);
     //Apply the perception brightness proportion for each color chanel
      float luminosity = col.x * 0.3 + col.y * 0.59 + col.z *  0.11;
      //Sample the noise texture, multiplyng the UVs by _GrainScale to make it customizable
      //The _RandomValue is a float set externaly to make the noise move every frame in our screen
      fixed4 noise = clamp(tex2D(_OldTVNoise, i.uv*_GrainScale + float2(_RandomNumber,_RandomNumber)), 0.0, 1.0);
      //Multiplying both values
      return fixed4(luminosity,luminosity,luminosity,1.0)* noise;
}
Vignetting effect, LIKE a cinema projector.
Well, How can we achieve this? There is an easy way to do it: using the same technique used above. Just multiply the result by another texture of a projector.

We declare in our properties block another variable for the vignette texture. And the fragment function should look like:
fixed4 frag (v2f i) : SV_Target
{
      // sample the texture
       fixed4 col = tex2D(_MainTex, i.uv);
     //Apply the perception brightness proportion for each color chanel
      float luminosity = col.x * 0.3 + col.y * 0.59 + col.z *  0.11;
      //Sample the noise texture, multiplyng the UVs by _GrainScale to make it customizable
      //The _RandomValue is a float set externaly to make the noise move every frame in our screen
      fixed4 noise = clamp(tex2D(_OldTVNoise, i.uv*_GrainScale + float2(_RandomNumber,_RandomNumber)), 0.0, 1.0);

      //===> Here we take the value of the vignette texture
     fixed4 vignetteFade = tex2D(_VignetteTexture, i.uv);

     //Multiplying  values
      return fixed4(luminosity,luminosity,luminosity,1.0)* noise*vignetteFade;
}
I’ve explained this way because is the easier and the cheapest for the GPU. In the shader shown in the video and image, the vignetting is generated by code and it is customizable.
I ain’t going to explain how to do it in this article because it will make it too large. A clue how to do it, I’ve used the UV coordinates to know how far away the pixel is from the center of our image, and then, applying some kind of fade to black.
There are some more effects that I’ve used like the blur effect. I’ve written all the fragment function at the end of the article if you want to dig deeper.
In resume, to achieve a style just define your requirements and go through them step by step. Remember to work in an iterative way, the shader is something about perception, so how do you know your code is working properly if you don’t take a look time to time.
I hope you enjoy the article if you have some questions just comment or send me an email.
Here you can find the complete Pass including fragment function, it’s not all the shader, if you want to get it, please feel free to contact me.
		Pass
		{
			sampler2D _MainTex;
			sampler2D _OldTVNoise;
			float4 _MainTex_ST;
			float _ScreenPartitionWidth;
			float _NoiseAttenuation;
			float _GrainScale;
			float _RandomNumber;
			float _VignetteBlinkvelocity;
			float _VignetteDarkAmount;
			float _VigneteDistanceFormCenter;

			v2f vert (appdata v)
			{
				v2f o;
				o.vertex = UnityObjectToClipPos(v.vertex);
				o.uv = TRANSFORM_TEX(v.uv, _MainTex);
				return o;
			}
			float4 blur(sampler2D tex, float2 uv, float4 size)
			{
				float4 c = tex2D(tex, uv + float2(-size.x, size.y)) + tex2D(tex, uv + float2(0, size.y)) + tex2D(tex, uv + float2(size.x, size.y)) +
							tex2D(tex, uv + float2(-size.x, 0)) + tex2D(tex, uv + float2(0, 0)) + tex2D(tex, uv + float2(size.x, 0)) +
							tex2D(tex, uv + float2(-size.x, -size.y)) + tex2D(tex, uv + float2(0, -size.y)) + tex2D(tex, uv + float2(size.x, -size.y));
				return c / 9;
			}

			fixed4 frag (v2f i) : SV_Target
			{
				// sample the texture

				fixed4 col = tex2D(_MainTex, i.uv);

				//If the uv x cordenate is highter than _ScreenPartitionWidth we apply the b&w effect, if not, we apply the image render how it is.
			     if(i.uv.x >_ScreenPartitionWidth)
			     {
			      //This condition is done in order to draw a vertical line which is the frontier between the image processed and the normal image
			        if(abs(i.uv.x -_ScreenPartitionWidth) < 0.005)
			        return fixed4(0.0,0.0,0.0,1.0);

			        //Apply the perception brightness proportion for each color chanel
				float luminosity = col.x * 0.3 + col.y * 0.59 + col.z *  0.11;

				fixed4 noise = clamp(fixed4(_NoiseAttenuation,_NoiseAttenuation,_NoiseAttenuation,1.0) + tex2D(_OldTVNoise, i.uv*_GrainScale + float2(_RandomNumber,_RandomNumber)), 0.0, 1.0);
				float fadeInBlack = pow(clamp(_VigneteDistanceFormCenter -distance(i.uv, float2(0.5,0.5)) +  abs(cos( _RandomNumber/10 +  _Time*10*_VignetteBlinkvelocity))/4, 0.0, 1.0),_VignetteDarkAmount);
				float4 blurCol = blur(_MainTex, i.uv, float4(1.0,1.0,1.0,1.0));
				float blurValue = (blurCol.x * 0.3 + blurCol.y * 0.59 + blurCol.z *  0.11);
			     	return fixed4(luminosity,luminosity,luminosity,1.0)/blurValue * noise * fadeInBlack*fadeInBlack * blurValue;

			     }
			     else{
			      	return col;
			     }
			}
			ENDCG
		}
	}
}